Stretch from a side, more blend modes, Finish first
Drag any side of a selected layer to stretch a picture or extend a box while the other side stays put, or hold Command to scale from that side. Layers and effects now blend with the same thirteen modes as the first studio, and every menu sits on its own surface again. On the Canvas tab, Bloom, Streaks, Trails, Paper and Grade come first, and a layer shows when the whole canvas already carries one of them.
Stretch and extend from a side
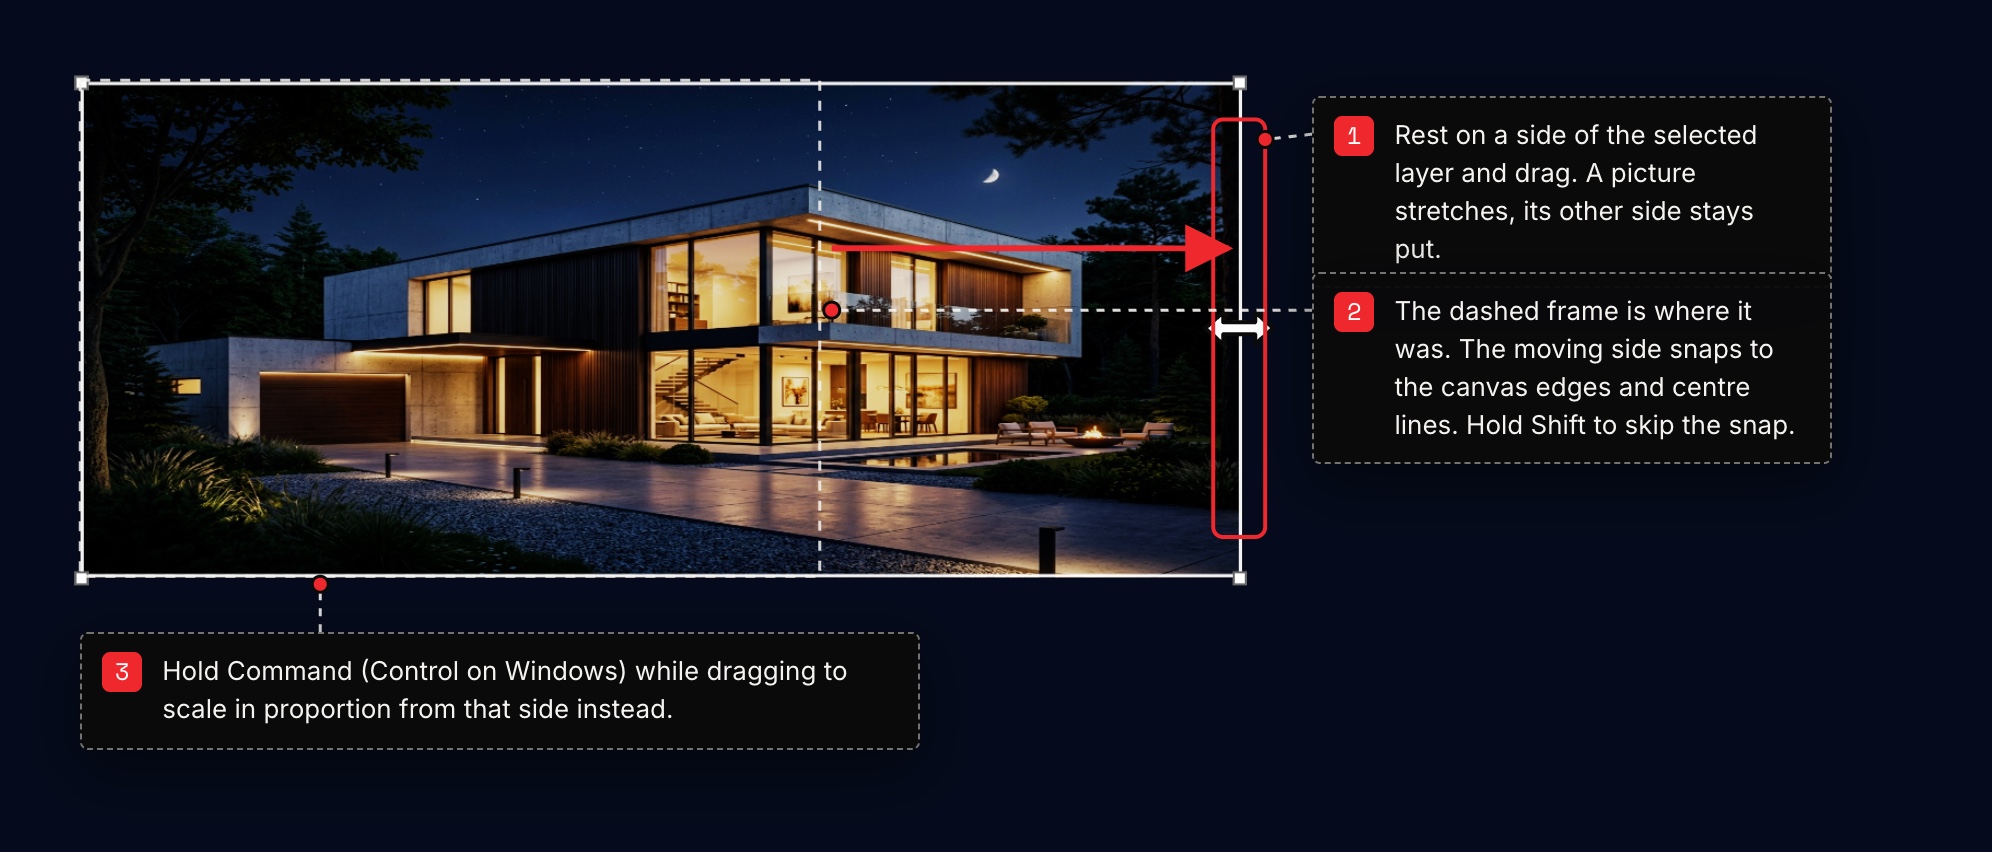
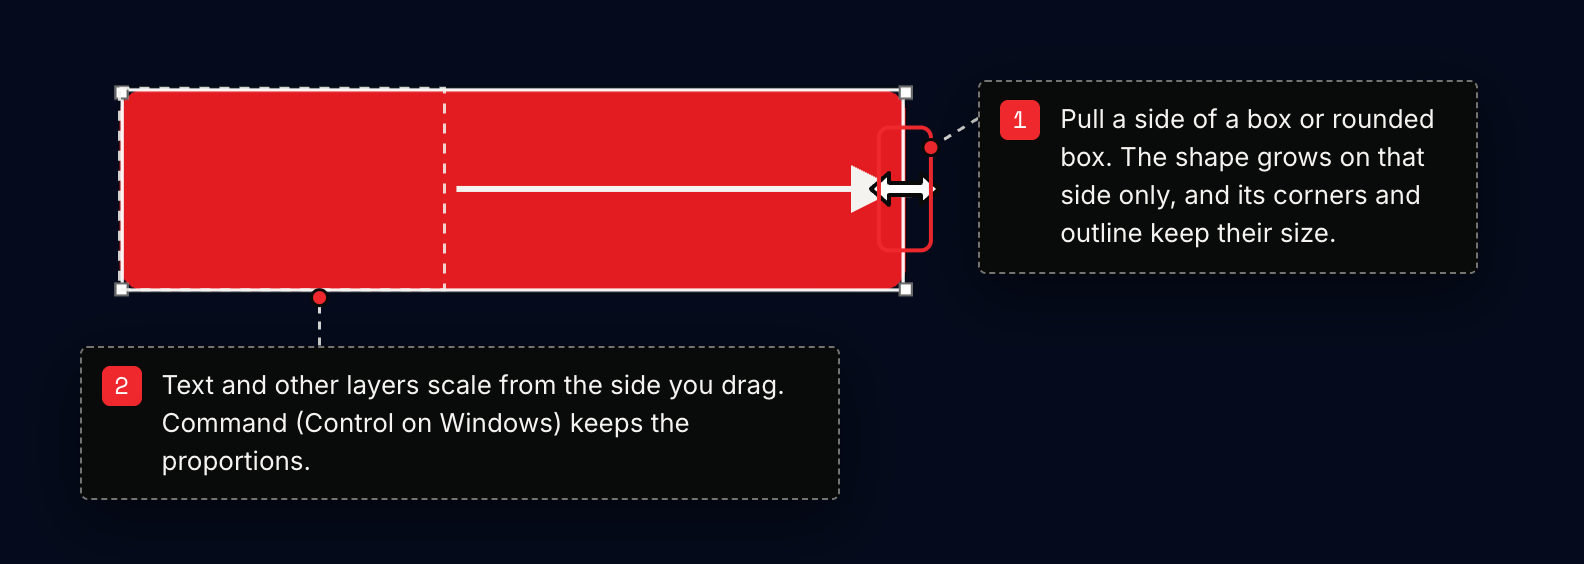
Move the pointer to a side of the selected layer and drag. A picture stretches along that axis, a box grows its own width or height with its outline unchanged, and any other layer scales from that side. The opposite side stays exactly where it was, and the moving side snaps to the canvas edges and centre lines. Hold Command (Control on Windows) to scale in proportion from the side instead.
- 01Select a layer and rest the pointer on one of its sides. A small handle appears on that edge.
- 02Drag the side. A picture stretches, a box or rounded box grows on that side, and any other layer scales from that side. The opposite side stays where it was.
- 03The moving side snaps to the canvas edges and centre lines. Hold Shift to skip the snap, or Command (Control on Windows) to scale in proportion from that side instead.
- 04For a picture, Stretch X and Stretch Y also sit under Placement in the Layer tab, where they can be keyed and bound to sound.
Thirteen blend modes
The Blend menu on a layer, and on an effect's compositing, now offers Overlay, Darken, Lighten, Color dodge, Color burn, Hard light, Soft light, Difference and Exclusion beside Normal, Add, Screen and Multiply, the same set as the first studio. Menus across the studio sit on their own surface again instead of floating over the panel.
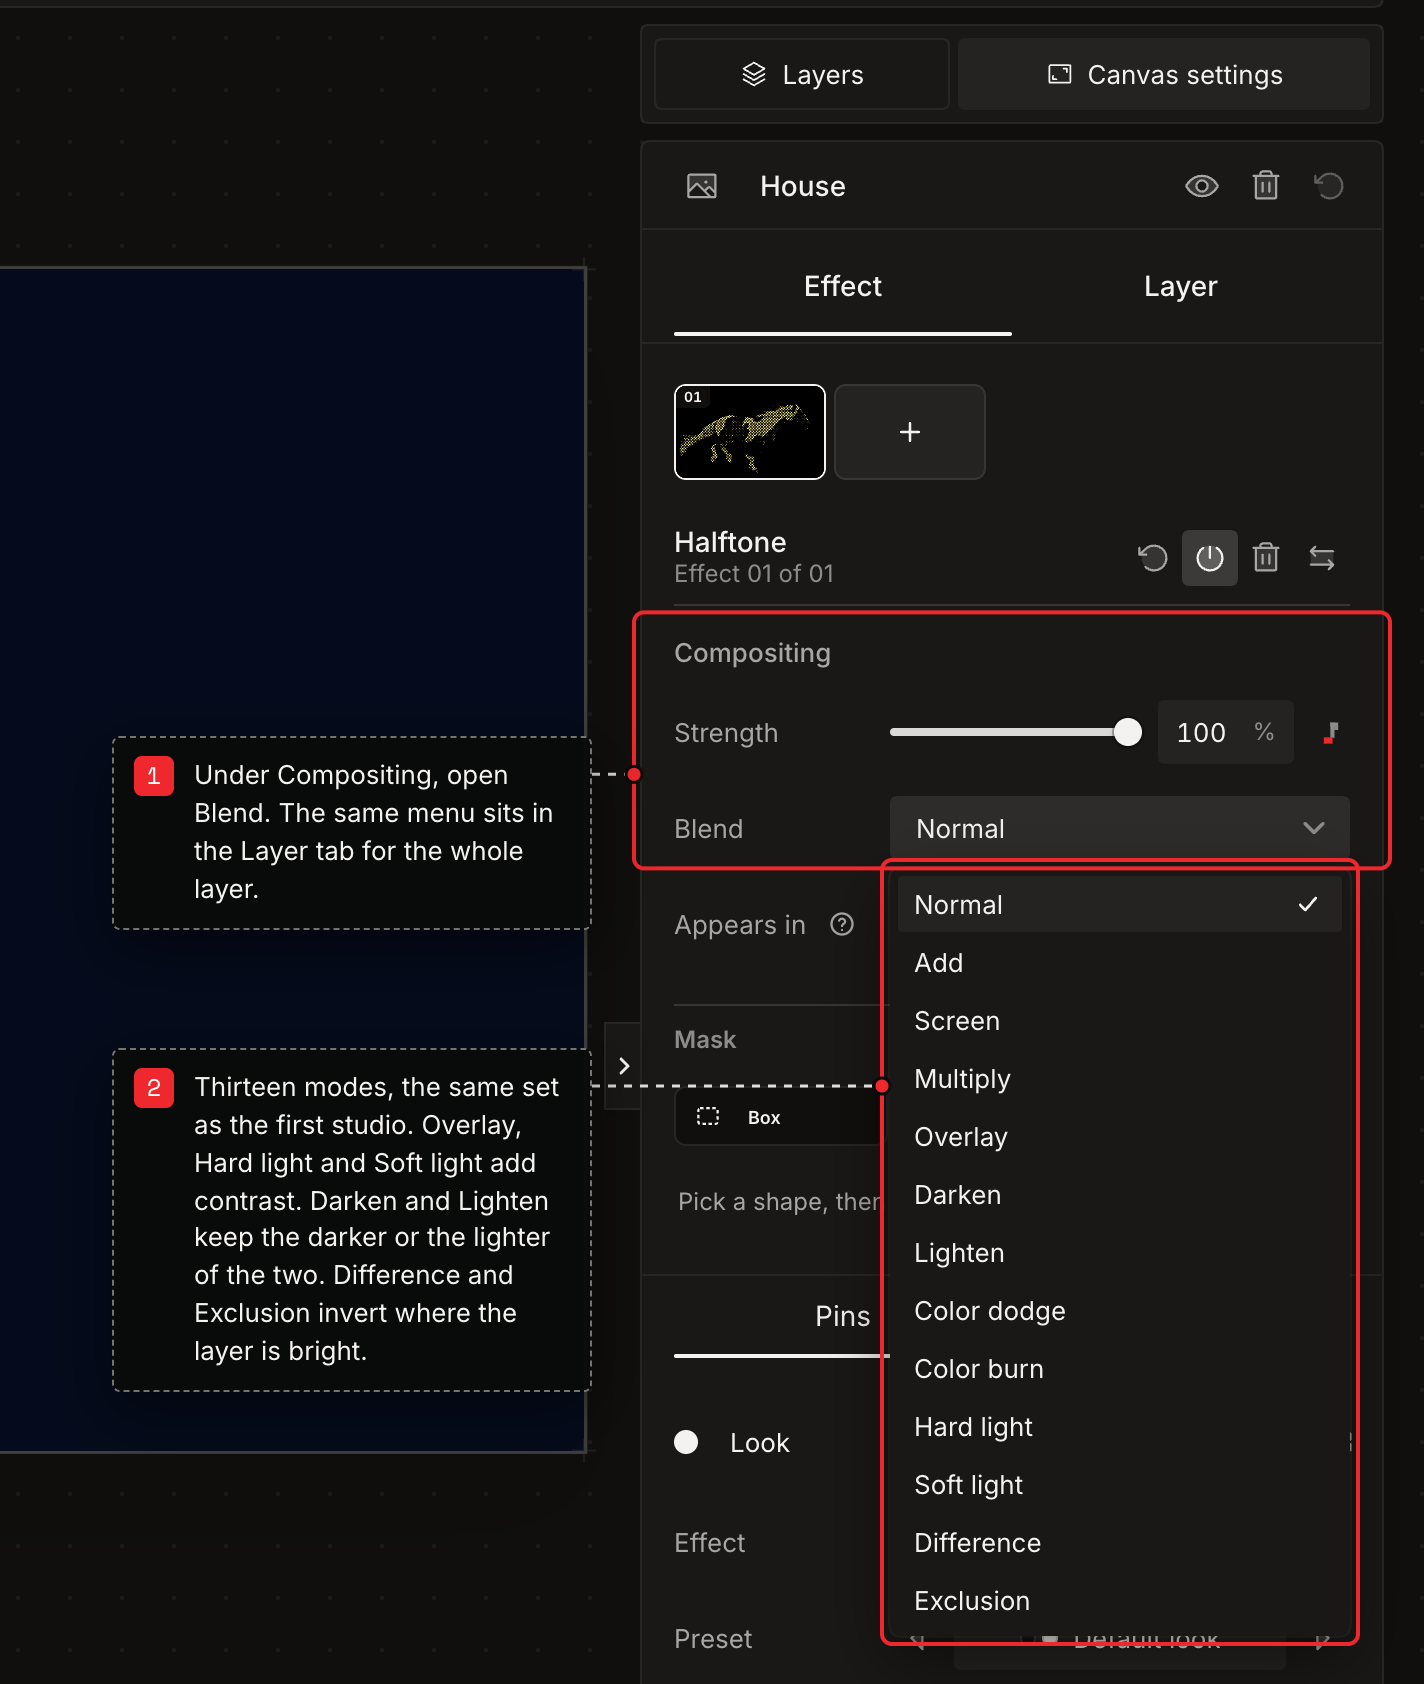
- 01Open the Layer tab and pick a mode under Compositing to blend the whole layer, or open an effect and pick one under its own Compositing.
- 02Overlay, Hard light and Soft light add contrast. Darken and Lighten keep the darker or the lighter of the two. Difference and Exclusion invert where the layer is bright.
Finish first on the Canvas tab
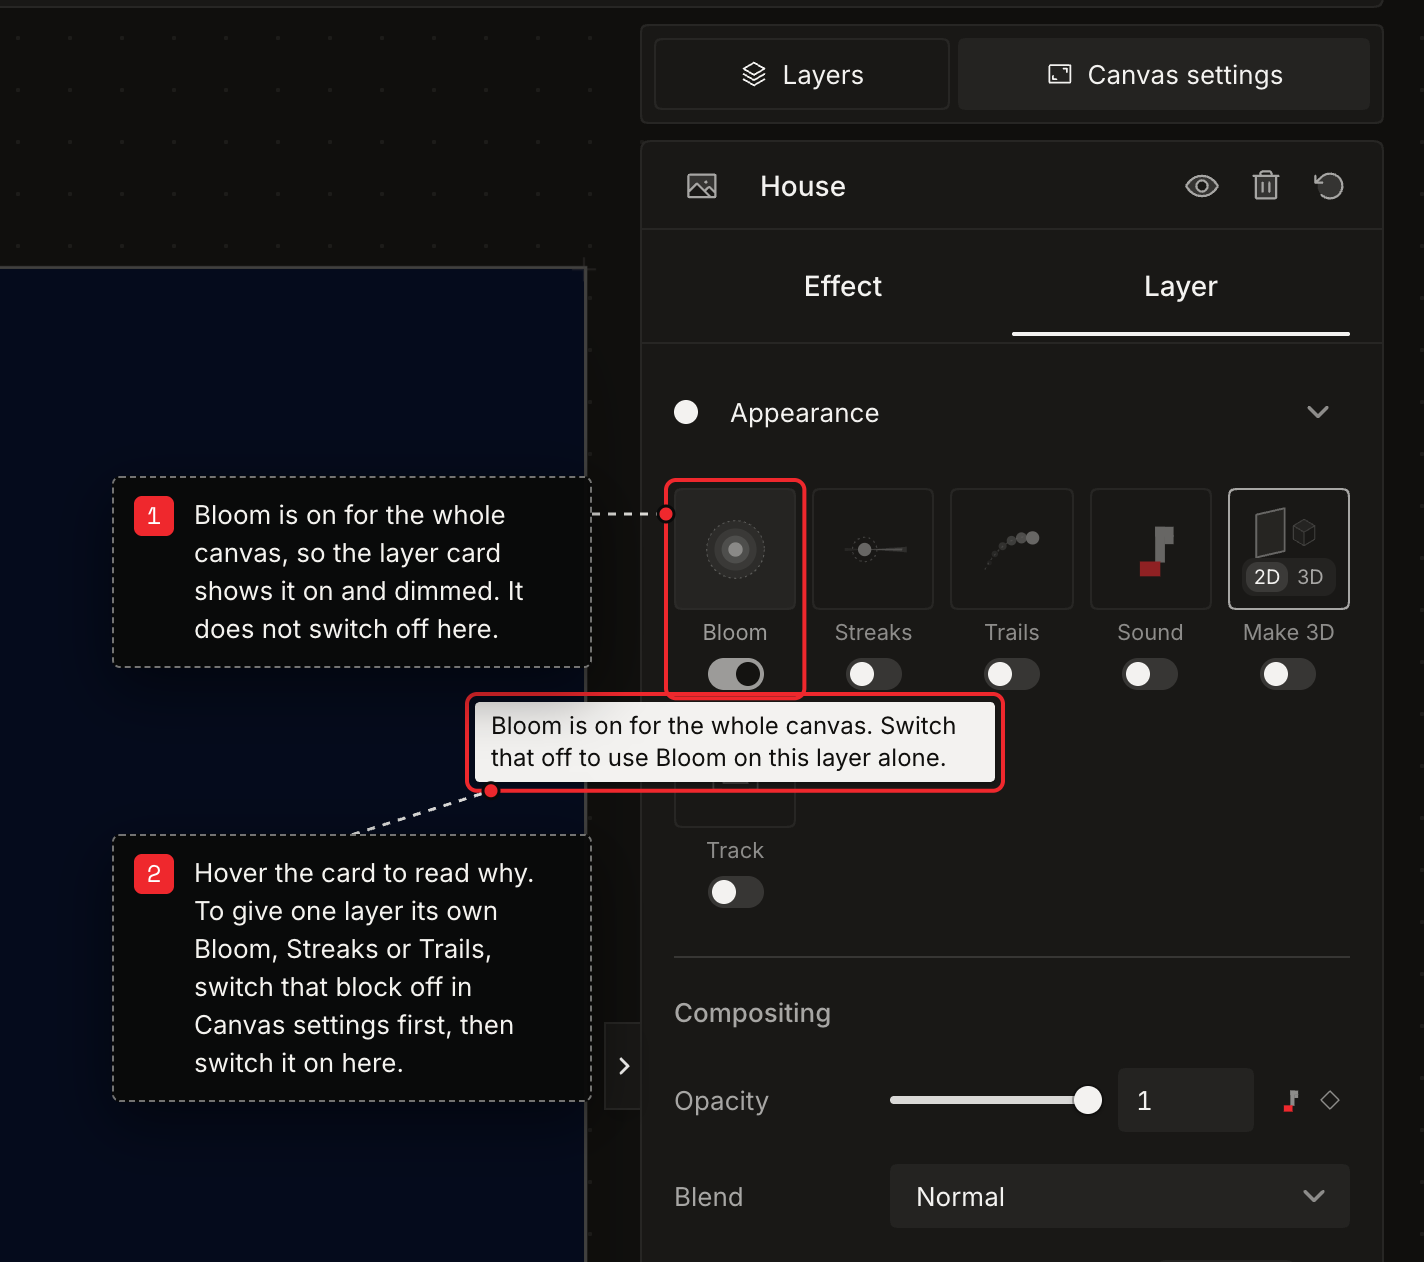
Bloom, Streaks, Trails, Paper and Grade now open at the top of the Canvas tab, with Start from, Background, Size and Time folded below. When the whole canvas has Bloom, Streaks or Trails, a layer's own card shows it on but dimmed; hover it to read that the canvas has it, and switch the canvas one off to use it on that layer alone.
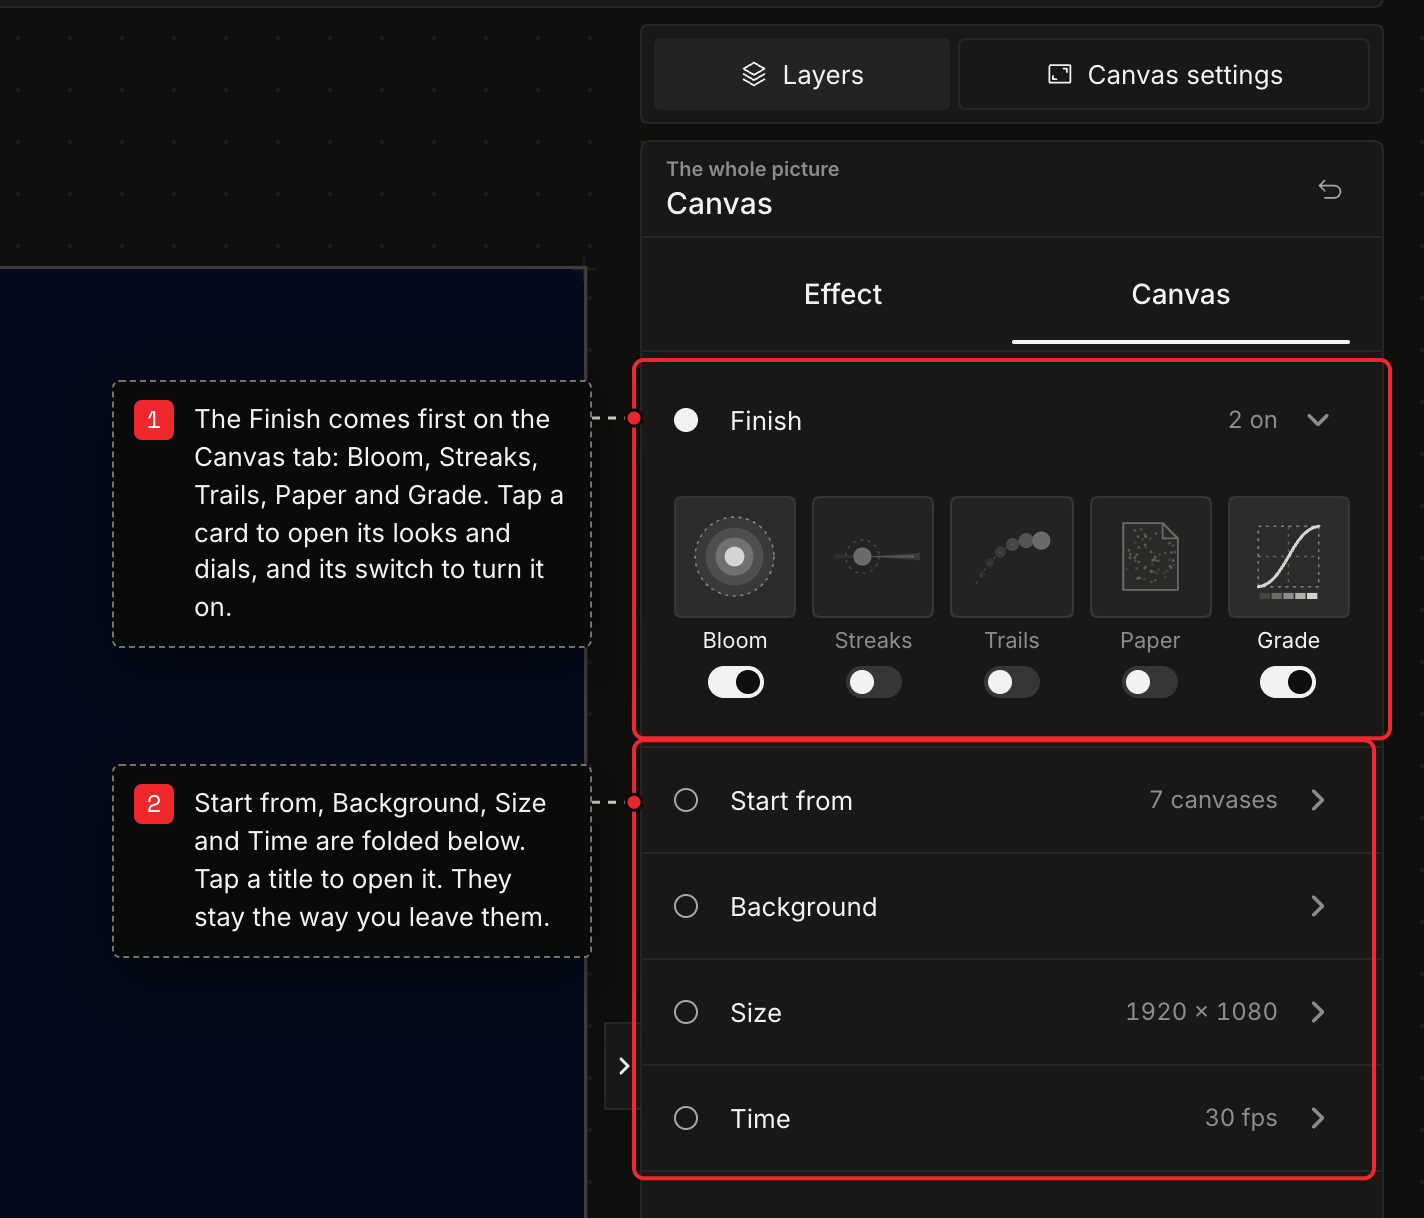
- 01Open Canvas settings. The Finish cards come first: tap a card to open its looks and dials, and its switch to turn it on.
- 02Start from, Background, Size and Time are folded below. Tap a title to open it, and it stays the way you leave it.
- 03When the whole canvas has Bloom, Streaks or Trails, the layer's card shows it on and dimmed. Hover it to read why.
- 04To give one layer its own Bloom, Streaks or Trails, switch that block off in Canvas settings first, then switch it on in the layer's Appearance row.